How to Set Up Your Automatic Cat Feeder: 2026 First-Time Installation Guide
How to Set Up Your Automatic Cat Feeder: 2026 First-Time Installation Guide
Introduction
An automatic cat feeder looks straightforward — fill it, set the time, and let it feed your cat. In practice, first-time setup has several steps that are easy to miss. Programming the clock wrong, using the wrong kibble size, or introducing the feeder incorrectly leads to jams, missed meals, and a cat that refuses to eat from it.
This walks through the complete setup process chronologically, from unboxing to the first successful meal.
Step 1: Unbox and Inspect
Before plugging anything in, confirm you have all parts:
- Feeder base unit
- Food hopper / kibble container
- Food bowl or tray
- Power adapter or batteries (some feeders do not include batteries)
- User manual
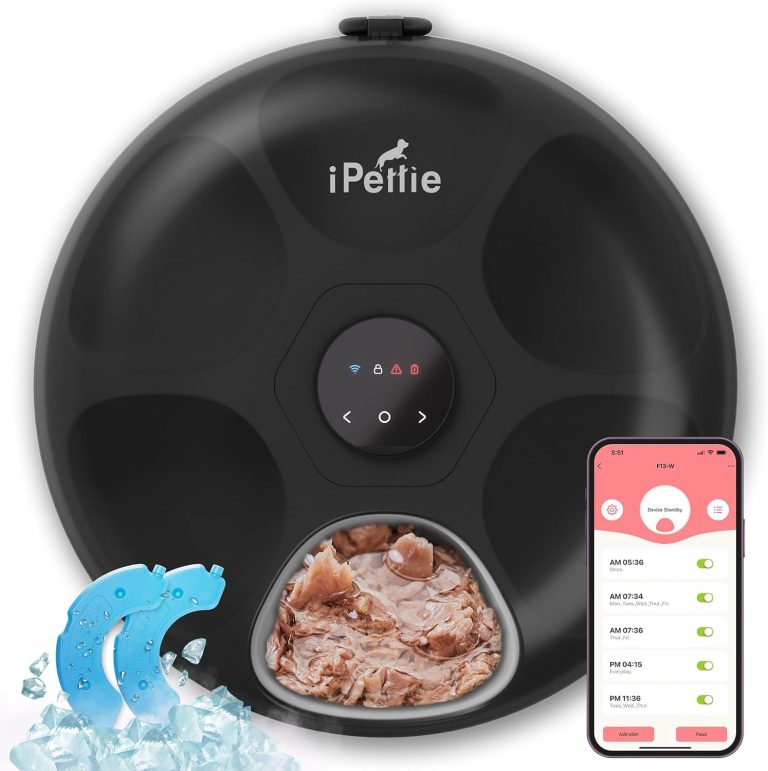
- Any accessories (ice packs for wet food models, RFID tags for multi-cat models)
Check the bowl material. If it is stainless steel or ceramic, confirm there are no chips or cracks. If the bowl is plastic, consider upgrading to a stainless steel replacement if your brand offers one.
Remove all packaging tape, plastic film, and foam inserts. Stickers on the display screen should be removed. Some feeders ship with a “test mode” sticker that blocks the dispenser — remove it.
Clean the bowl and hopper with warm water and mild soap. Rinse thoroughly and dry completely before filling.
Step 2: Install Power
Battery Installation
Most feeders use AA, C, or D batteries. Check the manual for the correct type. Installing the wrong size can damage the battery contacts.
- Use fresh, name-brand alkaline batteries. Cheap batteries leak and corrode contacts.
- Insert batteries following the polarity markings (+ / -) inside the compartment.
- If the compartment uses a screw-fastened cover, do not overtighten — it strips easily.
- After installing, press the manual dispense button to confirm the feeder has power.
AC Power Installation
- Use only the adapter that came with the feeder. Third-party adapters can supply wrong voltage.
- Plug the adapter into the feeder first, then the wall outlet.
- Route the cord so it cannot be chewed. Use cord covers or run it along baseboards.
- If the feeder has both AC and battery backup, install both. The batteries provide backup during power outages.
USB Power
- Use a 2.4A or higher USB port. Low-power ports (computer USB, older phone chargers) not run the feeder reliably.
- The USB cable is often the first component to fail. Keep a spare.
Step 3: Set the Clock and Schedule
Setting the Time
This is the step most people get wrong on the first try.
For timer feeders with physical buttons:
– The clock is usually 12-hour (AM/PM). Set 12:00 PM as 12, not 0.
– Double-check AM/PM after setting. A feeder set 12 hours off will dispense at midnight instead of noon.
– If the feeder uses a rotary dial, turn it to the current time and lock it in place.
For smart feeders with app setup:
– Download the app before plugging in the feeder.
– Create an account and follow the in-app pairing instructions.
– Most smart feeders auto-sync time from your phone. If the displayed time is wrong, check the app’s time zone setting.
Programming Meal Times
Start simple. Program one or two meals per day for the first week. Add more meals once you confirm the feeder works reliably.
For each meal, set:
– Time of day
– Portion size (number of portions or grams)
– Repeat schedule (daily, weekdays only, etc.)
Test the Schedule
After programming, press the manual dispense button to confirm the feeder works. Then advance the clock by 1-2 minutes past the first meal time and confirm the feeder dispenses automatically. This test catches programming errors before your cat depends on the feeder.
Step 4: Choose the Right Food
Kibble Size Matters
Automatic feeders work best with uniform, small-to-medium kibble. Check your feeder manual for the recommended kibble diameter.
- Best for most feeders: 8-10mm round or oval kibble
- Prone to jamming: Large-kibble formulas (12mm+), irregular shapes, freeze-dried raw pieces
- Too small: Tiny kibble can slip past the auger and dispense uncontrolled amounts
If your cat eats a food that does not work well in your feeder, consider mixing it with a small amount of feeder-friendly kibble. Or use the feeder for dry meals and feed wet food separately.
Fill the Hopper Correctly
- Do not overfill. Fill to the max line or about 3/4 full.
- Stir or shake the hopper after filling to settle the kibble and prevent bridges.
- If the feeder has an anti-bridge cone, make sure it is centered.
Food Type Compatibility
| Food Type | Feeder Compatibility | Notes |
|---|---|---|
| Dry kibble (standard) | All feeders | Best option |
| Dry kibble (large breed) | Limited | Check kibble size limit |
| Freeze-dried raw | Poor | Irregular shape causes jams |
| Semi-moist | Limited | Sticks to auger |
| Wet food | Specific models only | Cat Mate, PETLIBRO Polar only |
Step 5: Set Up the Feeder Location
Placement Requirements
- Flat, level surface — an uneven feeder can jam or tip
- Away from walls — allow 4-6 inches behind the feeder for ventilation
- Not in direct sunlight — heat can spoil food and damage the unit
- Away from heat vents, radiators, or drafty windows
- On a non-slip mat or towel to prevent sliding
- Near a power outlet (for plug-in models) or accessible for battery changes
Bowl Height
The bowl should be at a comfortable height for your cat. Most feeder bowls are floor-level. If your cat has arthritis or mobility issues, place the feeder on a low platform (2-4 inches tall).
Step 6: Introduce the Feeder to Your Cat
The most common reason first-time owners return a feeder: the cat refuses to eat from it. This is almost always an introduction problem, not a feeder problem.
Day 1-2: Feeder Off, Food Visible
Place the feeder in the feeding area with the power off. Put a small amount of kibble in the bowl and some on the floor around the feeder. Let the cat investigate and eat from the bowl without the feeder running.
Day 3-4: Feeder On, Same Schedule
Turn the feeder on and program one meal at the cat’s usual feeding time. Stay nearby during the first dispense. Most cats are startled by the noise the first time. Reassure them with pets or treats.
Day 5-7: Full Transition
Add the cat’s remaining meals to the feeder schedule. Phase out the old feeding method. By the end of week one, the cat should approach the feeder at meal times on its own.
Troubleshooting refusal:
– Put a small amount of a high-value treat in the bowl to encourage approach
– Feed the first few meals from the feeder while you are home, so the cat associates it with positive attention
– If the cat is afraid of the noise, wrap the feeder in a towel to dampen sound for the first week
Step 7: Configure Smart Features (Smart Feeders Only)
WiFi Connection
- Place the feeder within range of your 2.4GHz WiFi network (most smart feeders do not support 5GHz)
- Use the app to connect the feeder to WiFi. This usually involves putting the feeder in pairing mode (press and hold a button) and selecting the network in the app
- If connection fails: restart the feeder, restart the router, and try again. Some brands require the phone to be on the same 2.4GHz network during setup
Notifications
Enable these notifications in the app:
– Low food level
– Low battery
– Missed meal / feeder jam
– Manual dispense confirmation
Disable notifications you do not need to avoid alert fatigue.
Firmware Update
Check for firmware updates before your trip. An update during an extended absence can reset the feeder’s schedule.
Step 8: First 48-Hour Test
Run a 48-hour test before relying on the feeder for a trip or daily feeding:
- Fill the hopper completely
- Program your standard schedule
- Leave the feeder running without checking it
- After 48 hours, check that all meals dispensed correctly
- Check the bowl for leftover food (indicates portion sizes are too large)
- Check the hopper to confirm food is flowing through the auger
If any meal was missed, diagnose the cause before depending on the feeder.
Common First-Time Setup Mistakes
| Mistake | Consequence | Fix |
|---|---|---|
| AM/PM wrong on clock | Feeder dispenses 12 hours off | Double-check time setting |
| Overfilling hopper | Kibble bridges, feeder jams | Fill to 3/4 full |
| Wrong battery type | Feeder runs slowly or not at all | Use specified battery type |
| Skipping manual test | Jam discovered when cat is hungry | Always test manually after setup |
| Cat not introduced gradually | Cat refuses to eat from feeder | Follow 5-7 day introduction |
| Feeder on uneven surface | Feeder tips, food scatters | Level the surface |
| WiFi setup on 5GHz network | Feeder cannot connect | Switch phone to 2.4GHz network |
| App not synced after time zone change | Feeder dispenses at wrong local time | Update time zone in app |
Maintenance After Setup
After the first week of successful use, establish a maintenance routine:
| Task | Frequency |
|---|---|
| Wipe bowl and hopper | Weekly |
| Full disassembly clean | Monthly |
| Battery replacement | Every 2-3 months |
| Check auger for wear | Every 3 months |
| App and firmware updates | Quarterly |
| Replace ice packs (wet food models) | As needed |
FAQ
Can I set up the feeder without the app for a smart feeder?
Most smart feeders require app setup for initial configuration. After setup, the feeder follows its programmed schedule independently. Some allow basic programming from buttons on the device.
My feeder dispenses at the wrong time. What went wrong?
Most likely AM/PM error on a 12-hour timer. Check the clock setting. For smart feeders, verify the app’s time zone matches your location.
The feeder jammed on the first use. What should I do?
Empty the hopper, clean the auger mechanism, and restart with smaller kibble. Test with a small amount before filling the full hopper.
How long does it take for a cat to accept a new feeder?
Most cats accept within 3-7 days if introduced gradually. Cats that are anxious or have experienced food insecurity take longer. Use high-value treats and patience.
Do I need to keep the manual?
Yes. Keep it with the feeder or save a PDF version. The troubleshooting section for your specific model will save time later.