How to Ant-Proof Your Automatic Cat Feeder: 2026 Complete Guide
How to Ant-Proof Your Automatic Cat Feeder: 2026 Complete Guide
Introduction
You set up an automatic cat feeder for convenience — not to create an all-you-can-eat buffet for ants. Yet if you’ve ever walked into your kitchen to find a trail of ants marching straight into your cat’s feeder, you know exactly how frustrating this problem is. Ant infestations in automatic cat feeders are one of the most common complaints among pet owners, especially during warmer months.
The good news? You don’t need to abandon your automatic feeder or switch back to manual feeding. With the right ant-proofing strategies — from commercial ant moats to simple DIY barriers — you can keep your cat’s food ant-free without sacrificing the convenience of automated feeding.
In this guide, we’ll cover every proven method to ant-proof your automatic cat feeder, explain why ants target feeders in the first place, and help you choose the best solution for your specific setup.
Why Ants Invade Automatic Cat Feeders
Understanding why ants are attracted to your feeder is the first step to stopping them. Ants are driven by three basic needs: food, water, and shelter. Your cat’s feeder conveniently provides all three.
Food odor: Even the best-sealed automatic feeders emit kibble scent through the dispenser opening, vent holes, and the bowl area. Ants have an extraordinary sense of smell — they can detect food particles from several feet away.
Moisture: Wet food feeders, ice pack compartments, and even condensation from kibble create moisture that ants need to survive. Some ant species are particularly drawn to water sources.
Shelter: The warm, dark interior of a feeder mechanism provides an ideal nesting environment. Once ants discover a reliable food source inside your feeder, they’ll establish a trail that’s difficult to break.
Common entry points:
– The bowl/dispensing area (most common)
– Ventilation slots on the feeder body
– Gaps around the lid or hopper seal
– The opening where kibble drops into the bowl
– Power cord entry points (for plug-in models)
The key insight: ants are persistent but predictable. Block their access points, and they’ll move on to an easier food source.
Method 1: Using an Ant Moat (Most Effective Solution)
An ant moat is a water-filled barrier that sits between your feeder’s dispenser and the bowl — or under the feeder’s legs. Ants cannot cross water, making this the single most effective ant-proofing solution.
Commercial Ant Moats
Catit Ant Moat — Designed specifically for Catit automatic feeders but compatible with many brands. It sits under the feeder base and creates a water channel around the entire perimeter. Pros: purpose-built, easy to clean, transparent so you can see water levels. Cons: only fits certain feeder shapes.
Generic Ant Moats for Pet Bowls — These are raised platforms with a water-filled moat around the edge. Place your feeder on top, and ants can’t reach it. Available on Amazon for $10-20. Pros: universal fit, inexpensive. Cons: may look bulky, require daily water checks.
DIY Ant Moat Options:
| Method | Materials | Cost | Effectiveness |
|---|---|---|---|
| Pie plate moat | Metal pie plate, water | Under $5 | ★★★★☆ |
| Shallow dish + petroleum jelly | Shallow dish, petroleum jelly | Under $10 | ★★★★☆ |
| Feeder stand in water | Plastic tub, raised platform | Under $15 | ★★★☆☆ |
| Double-sided tape barrier | Wide double-sided tape | Under $8 | ★★★☆☆ |
DIY Pie Plate Method:
1. Place a metal pie plate (9-inch or larger) on your counter
2. Fill with 1/4 inch of water
3. Place your feeder on a smaller inverted bowl or riser in the center of the pie plate
4. The water barrier prevents ants from reaching the feeder legs
Important: Check the moat daily and refill as water evaporates. In dry climates, you may need to refill every 2-3 days.
Method 2: Silicone Seals and Gap Sealing
Ants can squeeze through incredibly small gaps — as tiny as 1/32 of an inch. Sealing these entry points with food-grade silicone creates an impenetrable barrier.
Where to Apply Silicone Seal
Around the kibble dispenser opening: Many feeders have a millimeter or two of gap between the rotating dispenser mechanism and the feeder body. A thin bead of food-grade silicone around this opening blocks ant entry.
Ventilation slots: If your feeder has large vent slots, cover them with fine mesh (stainless steel or nylon) secured with silicone. This maintains airflow while blocking ants.
Lid and hopper seal: The lid-to-hopper seal is a common weak point. Check if your feeder’s rubber gasket is still pliable. If it’s cracked or compressed, apply a new silicone bead or replace the gasket.
Power cord opening: For plug-in feeders, seal the cord entry point with silicone putty or electrical tape — but leave enough slack to avoid damaging the cord.
Recommended Sealants
| Product | Type | Food Safe | Best For |
|---|---|---|---|
| GE Silicone 1 | 100% silicone | Yes (when cured) | Permanent seals |
| DAP Food-Grade Silicone | Silicone sealant | Yes | Hopper repairs |
| Sugru | Moldable silicone putty | Yes | Irregular gaps |
| Plumber’s Putty | Putty | Yes | Temporary fixes |
Application tip: Apply silicone, smooth with a wet finger, and let cure for 24 hours before using the feeder. Do NOT use standard caulk — it may contain anti-mold chemicals that are unsafe for pets.
Method 3: Feeder Placement Strategies
Sometimes the simplest solution is changing where you put the feeder. Ants follow predictable paths, and strategic placement can dramatically reduce infestations.
Do: Place the Feeder on Smooth, Dry Surfaces
Tile floors, sealed concrete, and stainless steel counters give ants fewer climbing surfaces than wood or textured surfaces. Place the feeder at least 6 inches from walls — ants often travel along baseboards and wall edges.
Do: Create a Physical Barrier Under the Feeder
A large ceramic tile, cutting board, or marble pastry board under the feeder creates a smooth surface that’s harder for ants to navigate. For extra protection, place the tile in a shallow tray of water (see Method 1).
Do: Elevate the Feeder
Raising the feeder 4-6 inches off the floor makes it harder for ants to access. Use a dedicated feeder stand or place the feeder on a sturdy platform. Just ensure the feeder is stable and won’t tip over.
Don’t: Place the Feeder Near Known Ant Trails
If you’ve seen ants along baseboards, around windows, or near pet doors, keep the feeder away from those areas. Follow ant trails back to their entry point and seal cracks in walls, windows, and door frames.
Don’t: Put the Feeder in Direct Sunlight
Heat accelerates food spoilage, increases moisture, and makes the feeder more attractive to ants. Keep the feeder in a cool, shaded area.
Method 4: Natural Ant Deterrents (Companion Measures)
These methods work best as secondary defenses alongside a physical barrier like an ant moat.
Cinnamon and Spice Barriers
Ants strongly dislike cinnamon, cayenne pepper, and coffee grounds. Sprinkle a thin line of ground cinnamon or cayenne pepper around the feeder’s base. Reapply after cleaning or every few days. Warning: Some cats are sensitive to strong spices — use sparingly and monitor your cat’s reaction.
Diatomaceous Earth
Food-grade diatomaceous earth (DE) is a natural powder that dehydrates and kills ants. Sprinkle a thin ring around the feeder area. DE remains effective as long as it stays dry. Important: Use only food-grade DE, not pool-grade (which is chemically treated). While food-grade DE is generally safe for pets, avoid creating airborne dust clouds that could irritate your cat’s respiratory system.
Essential Oil Barriers
A few drops of peppermint, tea tree, or citrus oil on cotton balls placed near the feeder can repel ants. However, many essential oils are toxic to cats — particularly tea tree and citrus oils. If you have cats, skip this method entirely and stick to cinnamon or physical barriers.
Vinegar Cleaning
Wipe down the feeder area, counter, and floor with a 50/50 white vinegar and water solution. Vinegar disrupts ant pheromone trails, making it harder for ants to navigate back to the feeder. This is safe for cats and non-toxic.
Method 5: Feeder Maintenance That Reduces Ant Attraction
Regular maintenance dramatically reduces your feeder’s attractiveness to ants.
Daily Maintenance
- Wipe the bowl area after each meal cycle
- Remove any kibble crumbs or dust around the feeder
- Check the ant moat water level (if using one)
- Inspect for ant trails on nearby surfaces
Weekly Maintenance
- Fully disassemble the feeder and wash all parts with warm soapy water
- Clean the dispenser mechanism with a small brush
- Wipe down the interior of the hopper
- Check all seals and gaskets for wear
- Vacuum around and under the feeder
Monthly Maintenance
- Deep clean with a vinegar solution (50/50 water/vinegar)
- Inspect and reapply silicone seals if needed
- Rotate kibble stock — older kibble attracts more pests
- Check for cracks in the feeder body
Kibble Selection Matters
Not all kibble is equally attractive to ants. Dry foods with higher fat content and stronger odors tend to attract more ants. Consider switching to:
– Low-fat kibble formulas
– Freeze-dried raw options (less odor)
– Smaller kibble sizes that leave fewer crumbs
Ant Proofing by Feeder Brand
Different feeder designs have different vulnerabilities. Here are brand-specific ant-proofing strategies:
Cat Mate C5000
- Vulnerability: Large bowl opening, vented lid
- Fix: Apply silicone seal around the clear lid gasket. Use the Cat Mate ice pack tray as a built-in moat overnight.
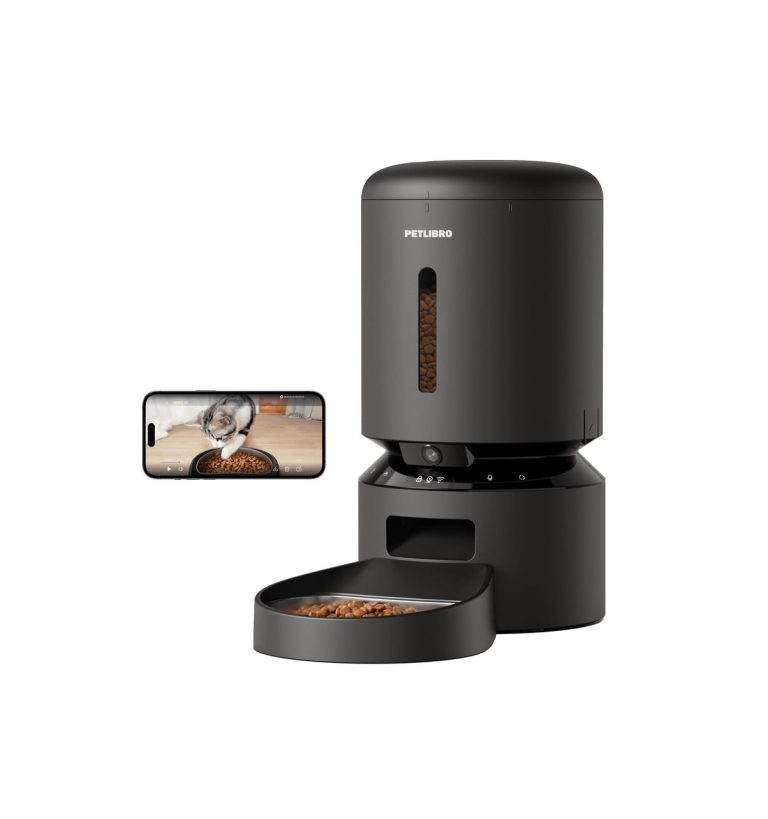
PETLIBRO Polar (Wet Food Feeder)
- Vulnerability: Ice pack compartment creates moisture
- Fix: Ensure ice pack seal is intact. Wipe condensation daily. Use an external ant moat under the feeder.
WOPET / PETKIT Camera Feeders
- Vulnerability: Multiple ventilation slots on the base
- Fix: Cover slots with fine mesh on the inside (not the outside, to preserve appearance). Seal the base-to-hopper connection.
SureFeed Microchip Feeder
- Vulnerability: The lid seal mechanism has moving parts
- Fix: Check the rubber gasket regularly. Apply food-grade silicone grease (not silicone caulk) to maintain the seal without affecting moving parts.
Gravity Feeders
- Vulnerability: Wide-open bowl, no sealed dispenser
- Fix: These are the hardest to ant-proof. An ant moat is essential. Consider upgrading to a sealed-dispenser feeder if ants are a persistent problem.
When to Replace vs. Repair
Sometimes ant-proofing isn’t enough because the feeder itself is compromised.
Replace your feeder if:
– The plastic body has visible cracks or warping
– Rubber gaskets are permanently compressed or cracked
– The dispenser mechanism no longer closes fully
– Ants have nested inside the motor housing
Repair the feeder if:
– Silicone seals have degraded (these are replaceable)
– The lid no longer fits snugly (can be adjusted)
– Minor cracks can be sealed with food-grade silicone
FAQ
Q: Can ants damage my automatic cat feeder?
A: Yes. Ants can nest in the motor housing, clog the dispenser mechanism with debris, and contaminate the kibble supply inside the hopper. In severe cases, ants can cause mechanical failures.
Q: Are ant moats safe for cats?
A: Yes. Ant moats use plain water, which is safe if your cat drinks from it. Keep the moat clean and change water every 2-3 days to prevent mosquito breeding.
Q: Does keeping kibble in the original bag reduce ant attraction?
A: Yes. Transferring kibble to a sealed, airtight container reduces odor emission. Many pet owners find that storing kibble in a glass or heavy plastic container with a rubber seal significantly reduces feeder attraction.
Q: Will petroleum jelly on feeder legs stop ants?
A: Yes, but it requires reapplication. Smear a 1-inch band of petroleum jelly around each feeder leg. Ants get stuck attempting to cross. The downside: petroleum jelly collects dust and may transfer to your cat or floor.
Q: My feeder has an ant problem inside the mechanism — what do I do?
A: Fully disassemble the feeder, remove all kibble, and wash all parts. Use compressed air to clear the dispenser mechanism. Apply food-grade silicone to seal entry points before reassembling.
Q: Do electronic ant repellents work for cat feeders?
A: Most ultrasonic pest repellents are ineffective against ants. Stick to physical barriers — they’re proven, chemical-free, and safer for your cat.
Q: Can I use ant baits near the feeder?
A: No. Ant baits contain insecticides that can contaminate your cat’s food and water. Keep all pesticide products away from feeding areas.
Q: How often should I clean my feeder to prevent ants?
A: Daily bowl wipe-downs and weekly full disassembly cleaning are the minimum for ant prevention. During peak ant season (spring and summer), increase to daily full cleaning if possible.
Final Verdict
Ant-proofing your automatic cat feeder doesn’t have to be complicated or expensive. The hierarchy of effectiveness is clear:
- Ant moat — The gold standard. A simple water barrier stops virtually all ant species.
- Silicone seal upgrade — Seal the gaps ants exploit to get inside the feeder mechanism.
- Strategic placement — Keep the feeder away from walls, on smooth surfaces, and in shaded areas.
- Regular maintenance — A clean feeder is far less attractive to ants.
Our recommendation: Start with a commercial ant moat (Catit or generic) and apply food-grade silicone to your feeder’s common ant entry points. This combination costs under $30 and solves 95% of ant problems.
For persistent infestations, combine all four methods and consider whether your feeder has structural damage that requires replacement.
Disclosure: As an Amazon Associate, we may earn commissions from qualifying purchases. This does not affect the accuracy of our recommendations.