How to Train Your Cat to Use an Automatic Feeder: Step-by-Step Guide for Stressed & Anxious Cats 2026
How to Train Your Cat to Use an Automatic Feeder: Step-by-Step Guide for Stressed & Anxious Cats 2026
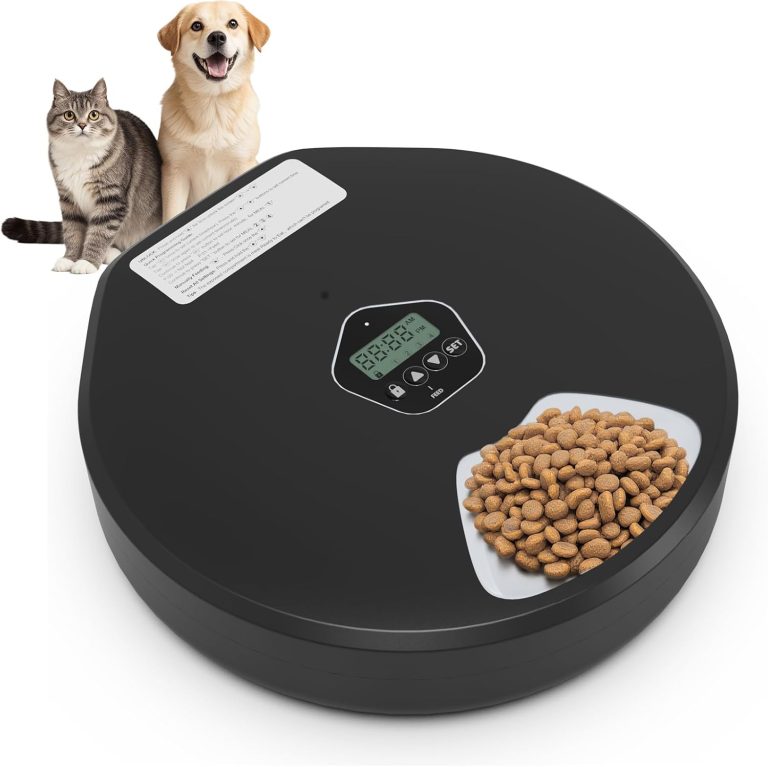
You bought an automatic cat feeder to make life easier. But your cat wants nothing to do with it. They hiss at it, refuse to eat from it, or bolt out of the room when the timer clicks.
You’re not alone. This is the most common problem new automatic feeder owners face. Cats are creatures of habit, and a plastic box that suddenly starts whirring and dispensing food is a baffling — and sometimes frightening — new object.
The good news: with a structured, gradual training approach, virtually any cat can learn to love their automatic feeder. This guide provides a complete step-by-step training protocol, especially for anxious, skittish, or rescue cats who need extra patience.
Why Cats Reject Automatic Feeders
Understanding your cat’s fear is the first step to solving it.
Common Reasons for Feeder Rejection
| Reason | What’s Happening | % of Cases |
|---|---|---|
| **Noise phobia** | The dispensing mechanism, timer beep, or motor whir is startling | ~45% |
| **Neophobia** | Fear of any new object in their territory; the feeder is an unfamiliar shape, smell, and texture | ~30% |
| **Negative association** | The feeder appears near a stressful event (vet visit, house move, new pet) | ~10% |
| **Texture/height aversion** | The bowl is too deep, too shallow, or made of a material your cat dislikes | ~10% |
| **Food freshness concern** | The food smells different after sitting in the hopper, or your cat prefers hand-fed freshness | ~5% |
The Feline Stress Response
When a cat encounters a frightening new object, their stress response follows a predictable pattern:
- **Freeze** — cat stops moving, ears flatten, pupils dilate
- **Flee** — cat retreats to a safe space (under the bed, behind furniture)
- **Fight** — hissing, swatting, or aggression toward the feeder (rare but possible)
- **Avoidance** — refusing to eat from or approach the feeder area
Your goal is to keep your cat in stage 1 (brief freeze) or skip directly to acceptance. Never push a cat past stage 1 into flight or fight — that reinforces the fear.
What You’ll Need Before Starting
- **The automatic feeder** (unplugged, with no batteries)
- **Your cat’s regular food** (place a small amount on and around the feeder)
- **High-value treats** (freeze-dried chicken, tuna flakes, or commercial cat treats)
- **A calm environment** (no loud noises, other pets, or household chaos)
- **Patience** — the full process can take 3-14 days
The 6-Step Training Protocol
Step 1: Scent Familiarization (Days 1-3)
Before the feeder does anything, your cat needs to accept it as just another piece of furniture.
What to do:
- Place the feeder (unplugged, no batteries) in the same room as your cat’s current feeding station — at least 6-8 feet away
- Put a few kibbles on top of the feeder and on the floor around it
- Do NOT turn the feeder on yet. Do NOT open the food compartments
- Let your cat investigate at their own pace
- Each day, move the feeder slightly closer to the feeding station
- Sprinkle treats on and around the feeder throughout the day
Signs of success: Your cat sniffs the feeder, eats treats near it, or rubs their cheek against it (scent-marking = acceptance).
If your cat is scared: Move the feeder further away and increase treat density. Use higher-value treats like tuna or chicken. Never force interaction.
Step 2: Static Feeding — Food on the Feeder (Days 3-5)
Now your cat accepts the feeder as a benign object. Time to associate it with food.
What to do:
- Place a small portion of your cat’s regular food **on top** of the feeder lid (not in the bowl)
- Also place some food **in the feeder bowl** (the tray where food dispenses)
- Leave the feeder unplugged and silent
- Stay nearby while your cat eats from the feeder — speak in a calm, encouraging tone
- Gradually reduce the food on top of the feeder and increase food in the bowl
- Keep treats scattered around the feeder base
Signs of success: Your cat eats comfortably from the feeder bowl with you present. They don’t flinch when approaching the feeder.
Troubleshooting: If your cat won’t eat from the bowl, check whether they dislike the bowl material. Some cats prefer ceramic or stainless steel over plastic. You can place a familiar bowl next to the feeder bowl, then gradually move the familiar bowl closer until it’s touching.
Step 3: Sound Desensitization (Days 5-8)
This is the most critical step for noise-phobic cats. You need to introduce feeder sounds gradually, at a distance where your cat remains calm.
What to do:
- Place the feeder at least 15 feet from your cat
- Set the feeder to dispense a small portion (or trigger manual dispensing)
- Have your cat’s favourite treats ready
- **First session**: Press the manual feed button from across the room. The moment the feeder makes sound, immediately give your cat a high-value treat and speak soothingly
- **Second session**: Move 5 feet closer. Repeat the sound + treat pairing
- **Third session**: Move next to the feeder. Sound + treat pairing
- **Fourth session**: Let your cat watch the food dispense from 5 feet away. Sound + treat + visible food reward
Important: Keep initial sessions short (2-3 sound exposures). Stop before your cat shows stress. The goal is to pair the sound with something positive (treats), not to overwhelm.
Sound profiles by feeder brand:
- **Cat Mate C5000**: Mechanical timer click + gear whir + lid pop (moderate sound)
- **PETLIBRO DockStream/Polar**: Soft chime + quiet auger rotation (quietest)
- **PETKIT Fresh Element**: Digital beep + dispense motor (medium volume)
- **WOPET feeders**: Single beep + quiet kibble fall (quiet)
- **SureFeed Microchip**: Soft motor whir (very quiet)
Signs of success: Your cat remains calm or looks toward the feeder when it makes sound, expecting a treat.
Step 4: Short Separation — Eating from the Active Feeder (Days 6-10)
Now your cat accepts the feeder sound. Time to eat from the active feeder while you’re nearby.
What to do:
- Program one regular mealtime on the feeder
- Stand next to the feeder when it dispenses
- Let your cat eat from the feeder bowl while you’re present
- Over 2-3 sessions, gradually move 1-2 feet away each time
- Eventually sit 10-15 feet away while your cat eats from the activated feeder
- Speak encouragingly: “Good kitty! What a smart cat!”
Pro tip: If your cat eats but seems hesitant, place a small amount of toppers (freeze-dried chicken crumbles, nutritional yeast) on the dispensed food as a reward for eating.
Signs of success: Your cat eats a full meal from the active feeder while you’re in the room but not right next to them.
Step 5: Full Cycle — Independent Feeding (Days 8-12)
Your cat now reliably eats from the active feeder with you nearby. Time to build independence.
What to do:
- Program the feeder for one scheduled meal at a time
- Be in a different room when the feeder dispenses
- Return after 5-10 minutes to check — your cat should have eaten
- Gradually extend your absence to 30 minutes, then 1 hour, then a full workday
- Once your cat reliably eats from one scheduled meal alone, add a second meal
- Transition to the full feeding schedule
Watch for: Some cats regress when you’re out of sight. If your cat doesn’t eat within 30 minutes of the scheduled time, return to Step 4 for a day, then try again.
Step 6: Independence — Full Auto Schedule (Days 12-14)
Your cat now uses the feeder independently. The final step is transitioning to your intended full schedule.
What to do:
- Set the feeder to your desired schedule
- Monitor the first 2-3 days by checking the feeder bowl 1-2 hours after each meal
- Use the feeder’s app (if smart) to confirm dispensing and check portion consumption
- If your cat eats reliably for 3 consecutive days, congratulations — training is complete!
Breed-Specific Considerations
Skittish or Rescue Cats
Rush the process and you’ll set back training by weeks. Take 2-3 days per step. Consider adding a Feliway diffuser near the feeding area during training.
Former Feral Cats
These cats need extra space during training. Give them an escape route and never block their access to a safe hiding spot. The feeder should be placed in a quiet, low-traffic area.
Senior Cats
Older cats may have hearing or vision changes that affect their response. Keep the feeder in a consistent, well-lit location. Consider feeders with backlit controls (like the PETKIT Fresh Element) if your senior cat eats in dim light.
Multi-Cat Households
Train each cat separately if possible. If one cat is brave and the other is scared, the scared cat may learn from watching the brave cat eat — but they may also feel pressured. Provide separate feeding stations if needed.
Troubleshooting Common Problems
My cat won’t go near the feeder
Return to Step 1. Move the feeder further away. Use higher-value treats. Some cats need 2-3 weeks of scent familiarization. Be patient.
My cat eats from the bowl but bolts when the timer goes off
The sound is still triggering a startle response. Return to Step 3 (sound desensitization) and practice more sound + treat pairings at a distance.
My cat eats the food but then vomits
Rapid eating is common when cats are still slightly stressed. Consider a slow-feeder bowl insert inside the feeder bowl, or break meals into smaller, more frequent portions.
My cat eats from the feeder only when I’m in the room
This is separation anxiety manifesting around food. Return to Step 5 and practice very short absences (1-2 minutes), gradually extending. Leave an article of clothing with your scent near the feeder.
The food smells different from the feeder
Kibble can absorb odours from the plastic hopper. Wash the hopper with warm water and mild soap (no bleach or strong chemicals). Consider adding a food-grade silica gel packet to the hopper.
Choosing the Right Feeder for an Anxious Cat
If you’re buying a feeder specifically for a nervous cat, prioritize:
- **Quiet operation** — PETLIBRO and WOPET models are the quietest
- **Gradual introduction features** — PETLIBRO app lets you start with just the app notification, then add dispense sounds later
- **Manual override** — being able to feed manually during training is essential
- **Battery backup** — feeder silence during a power outage prevents stress
- **Stainless steel bowl** — no plastic taste or smell affecting food acceptance
Recommended Products for Training
| Feeder | Why It Works for Training | Noise Level |
|---|---|---|
| PETLIBRO DockStream | App has “gentle introduction mode,” quietest dispense | Very quiet |
| WOPET Basic Timer | Simple mechanical timer, cheap enough to buy as training feeder | Quiet |
| PETKIT Fresh Element | Touchscreen allows manual feeding without app; slow-start option | Moderate |
| Cat Mate C5000 | Mechanical timer has consistent, predictable sound pattern | Moderate |
| PetSafe Smart Feed | Quietest kibble dispense with optional slow-feed function | Very quiet |
When to Give Up and Try a Different Approach
Not all cats will accept an automatic feeder. If you’ve followed this protocol for 21 days with no progress, consider:
- **A different feeder brand** — the sound profile may be the issue
- **A gravity feeder** (no sound, no mechanism) — compromises on portion control but eliminates noise fear
- **Manual feeding** — some cats simply need the ritual of you filling their bowl
- **Consulting a veterinary behaviourist** — severe neophobia may signal an underlying anxiety disorder
Training Quick Reference Card
| Step | Duration | Goal | Key Action |
|---|---|---|---|
| 1. Scent | 1-3 days | Feeder as furniture | Place treats on/around unplugged feeder |
| 2. Static feeding | 2-4 days | Eat from bowl | Place food on feeder and in bowl; feeder silent |
| 3. Sound desens. | 2-4 days | Accept feeder noise | Dispense from distance; pair with treats |
| 4. Short separation | 2-4 days | Eat while feeder active | Stand nearby while programmed meal dispenses |
| 5. Full cycle | 2-4 days | Eat independently | Leave room; check after 10-30 mins |
| 6. Independence | 2-3 days | Full schedule | Set desired schedule; monitor for 3 days |
Final Thoughts
Training a cat to use an automatic feeder is a test of patience — but it’s almost always achievable. The key is moving at your cat’s pace, never rushing a step, and making the feeder a source of positive associations.
Remember: your cat isn’t being difficult. They’re being a cat. A new object in their territory is, evolutionarily speaking, potentially dangerous. By methodically proving that the feeder means food and safety — not threat — you build trust that extends well beyond mealtime.
And when you finally watch your cat walk calmly to the feeder, eat their portion, and walk away without a second thought at the sound of the dispenser? That’s the moment it all becomes worth it.
Disclosure: As an Amazon Associate, we may earn commissions from qualifying purchases. This does not affect the accuracy of our recommendations.
Disclosure: As an Amazon Associate, we may earn commissions from qualifying purchases. This does not affect the accuracy of our recommendations.